Showing posts with label Php. Show all posts

Monday, 9 September 2013

phpinfo() has been disabled

Posted by Sarath On Monday, September 09, 2013 No comments
If you get the message while browsing php info page, it means that phpinfo function is disabled. To resolve this you will have to :

Remove phpinfo from disable_functions in php.ini

To locate php.ini file, use command :
# php --ini
Check the line Loaded Configuration File: for php.ini location. Remove phpinfo  from disable_functions in php.ini and save it.

Now check the phpinfo page..!!  8)

Saturday, 7 September 2013


The error normally occurs when PHP tries to process a big database records or when importing or exporting. To solve the error, there are two fixes. One is to increase PHP memory limit of the account by using a custom php.ini file. But sometimes it won't work.

If it didn't work, then you can fix the error by increasing the memory of the particular PHP script (displayed in error message) by adding an additional line at the top of the script:

Code: 
ini_set(”memory_limit”,”32M”);  
  (Change the value based on the error message).

Now browse the page again, perform the operation again. It will just work fine if you have set correct value based on the error message.

Friday, 12 July 2013

Recompiling apache

Posted by Sarath On Friday, July 12, 2013 No comments
Method 1: Recompilation from WHM
===========================
1. Login to the WHM of the server as user root.
2. Go to Software >> EasyApache (Apache Update)
3. Select a profile to load and click "Start customizing based on profile".
4. Select the Apache version and click next step.
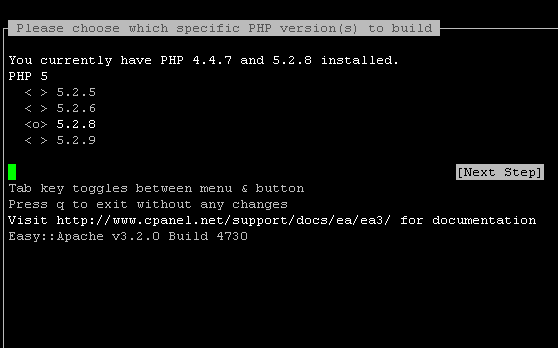
5. Select the Major PHP Version and click next step.
6. Select the PHP Minor Version and click next step.
If you are going to enable Apache/PHP modules, it is recommended to leave the default versions of Apache & PHP.
7. Enable the required modules. If the required modules are not listing, click "Exhaustive Options List" and select the modules.
8. Click "Save and Build".

Method 2: Recompilation using cPanel script /scripts/easyapache
================================================
1. Login to the server as root via SSH.
2. From the command line execute the following cPanel script.
Code: [Select]
# /scripts/easyapache
(It is highly recommended to run rebuild in screen)
3. Select "Start customizing based on profile".
4. Select the Apache version and click next step.
5. Select the PHP Version and click next step.
In our case we are going enable PHP modules and so it is recommended to leave the default versions of Apache & PHP.
6. Enable the required modules. If the required modules are not listing, click "Exhaustive Options List" and select the modules.
7. Click "Save and Build".

Done..!!

Friday, 21 September 2012

If you already have php and Mysql installed in your system/server and still getting the error, some changes need to be made in your php.ini file,
Open your php.ini file and search for extension=php_mysql.dll, uncomment the line (remove the semicolon in the beginning of the line)
Then search for extension_dir in php.ini file and change extension_dir =”C:\php\ext” if it is not.
Note : You need two sql dll files, php_mysql.dll and libmysql.dll which together provide you PHP mysql extension, first check in ext folder (C:\php\ext) in your PHP installation location.
if you don’t have ext folder, you need to download PHP zip version (http://windows.php.net/download/) containing those required files. Then copy ext folder to your PHP installation location,also copy libmysql.dll to your PHP installation location.
libmysql.dll should be reachable in your system, so copy it to c:\windows\system32.

Once you have done the above steps, restart IIS. That will work...